


How to Implement Azure Key Vault and Add a Secret to the Azure Key Vault


Introduction
In today's digital age, safeguarding sensitive data is paramount. Azure Key Vault provides a robust solution for securing your secrets, keys, and certificates. In this blog post, we'll embark on a journey into the world of Azure Key Vault, demystifying its creation process and exploring its capabilities. Whether you're a seasoned Azure pro or just beginning your cloud journey, this guide will equip you with the knowledge to harness the full potential of Azure Key Vault. Join us as we delve into the art of creating a secure vault for your digital treasures.
STEP 1 - Sign in to Azure: Log in to your Azure portal (https://portal.azure.com).

STEP 2 - Search for Key Vault: In the search bar, type "Key Vault" and select it from the results.

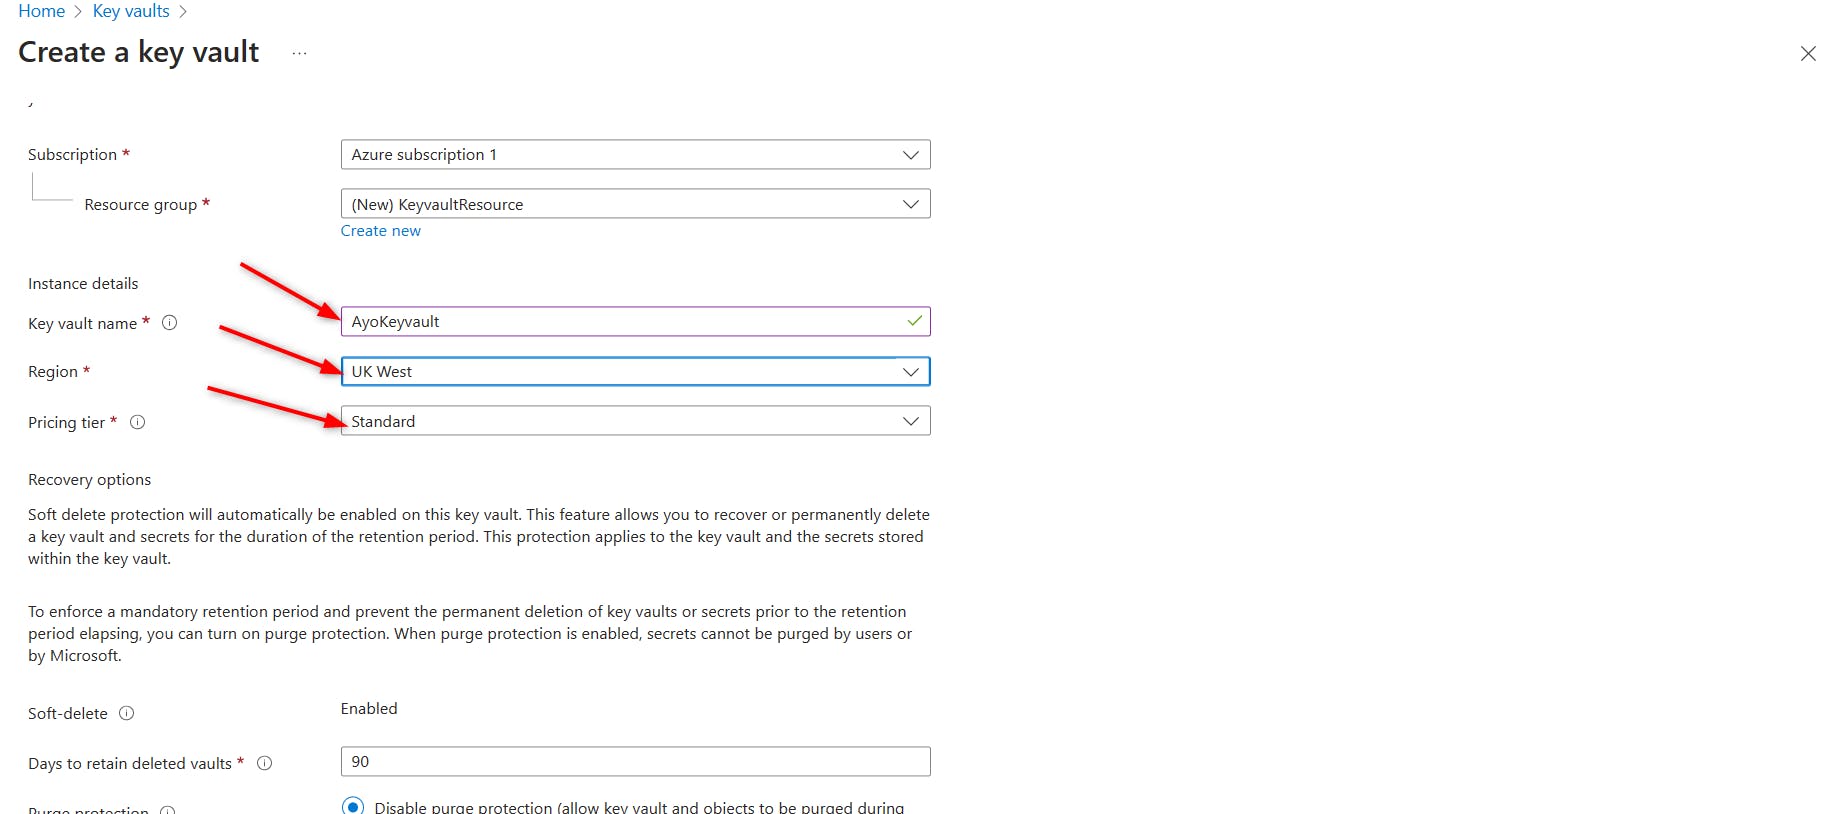
STEP 3 - Create a Key Vault: Click the "Create" button to begin configuring your Key Vault. You'll need to provide information like the subscription, resource group.

STEP 4 - Provide the information for the region, and a unique name for your Key Vault
STEP 5 - Review + Create: Review your settings and click "Create" to deploy the Key Vault.

STEP 6 - Wait for Deployment: Azure will take a moment to deploy the Key Vault. You can monitor the deployment progress in the Azure portal. Once the deployment is done, click on go to resource.

STEP 7 - Add a Secret: In the Key Vault, navigate to the "Secrets" section.

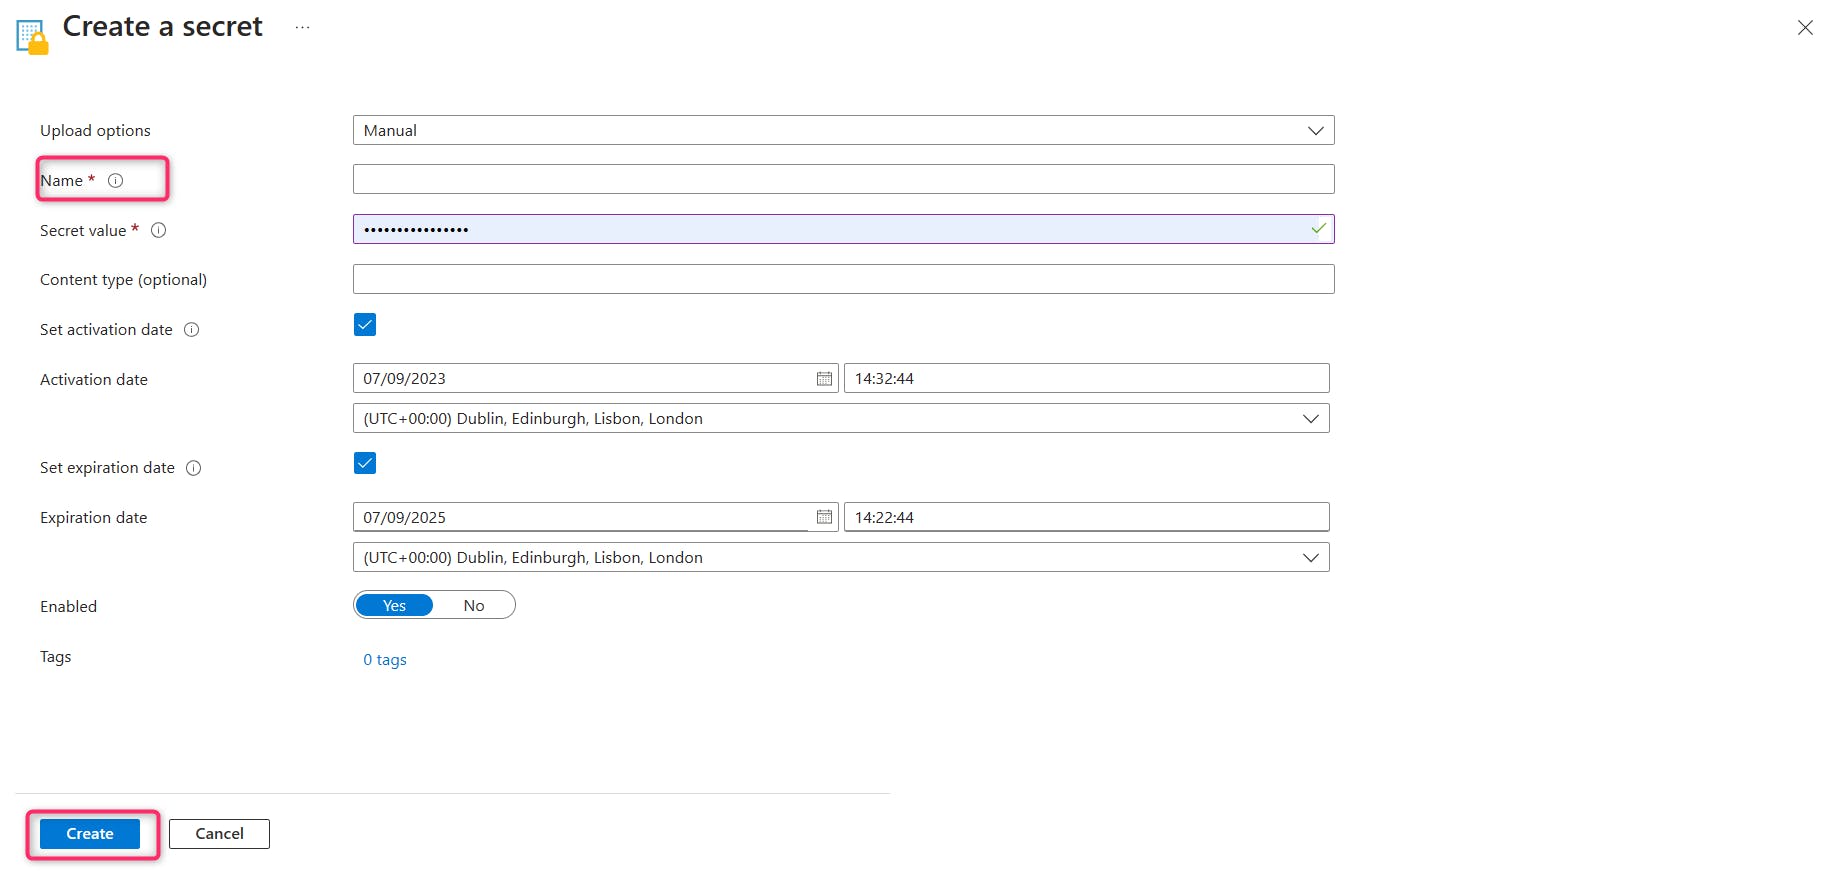
STEP 8 - Click the "+ Generate/Import" button to add a new secret. Provide a name and value for your secret. You can also configure additional settings like activation and expiration dates.

Now, you've successfully created an Azure Key Vault and added a secret to it. This secret is securely stored and can be accessed by authorized applications and services as needed. Make sure to keep the secret's access policies well-managed to maintain security